Do you love repurposing glass jars but dread the sticky, stubborn labels that cling to them? You’re not alone! Whether you’re upcycling for storage, crafting, or simply want a clean aesthetic, removing those pesky labels and their adhesive residue can be a real challenge. But fear not! How to remove labels from glass jars? This comprehensive guide will walk you through over 10 effective methods, ensuring your glass jars come out perfectly clean every time.
Let’s dive in and transform those sticky jars into pristine vessels!

How to Get Labels off Jars: Essential Preparation Steps
Before you begin, a little prep goes a long way, no matter which method you choose:

- Empty and Clean: First, make sure your jar is empty and rinsed out. Any food residue can make the process messier.
- Initial Scrape: Gently try to peel off any loose paper parts of the label. Sometimes, a surprising amount comes off easily, reducing the work for the next steps.
Water-Based Wonders: Simple Soaking Solutions
Water and heat are often your first and most effective allies against stubborn adhesives.
1. Hot Water and Dish Soap Soaking
This is often the simplest and most eco-friendly method.
- How-To: Fill a sink or a large basin with very hot water. Add a generous squirt of your favorite liquid dish soap. Fully submerge your glass jars, ensuring the labels are completely covered by the soapy water.
- Soak Time: Let them soak for at least 30 minutes. For truly stubborn labels, leaving them overnight can work wonders.
- Removal: After soaking, the label and adhesive should be soft enough to easily scrape off with your fingernail, an old credit card, or a plastic scraper.

2. Boiling Water Method
A quick burst of heat can be surprisingly effective.
- How-To: Carefully fill the empty glass jar with freshly boiled water. The internal heat will transfer to the glass and the label.
- Wait & Peel: Let the hot water sit inside the jar for approximately 5-10 minutes. While the jar is still warm, the label should peel off quite easily.
- Clean Up: Scrape away any remaining adhesive. Be cautious as the jar will be hot!
3. Dishwasher Cycle
Let your machine do the heavy lifting!
- How-To: Simply place the labeled jars in your dishwasher and run a standard hot wash cycle.
- Results: The combination of high heat and strong detergents in the dishwasher can often loosen labels significantly, making them easy to peel off once the cycle is complete.
Oil-Based Offensive: Dissolving Adhesives Naturally
Certain oils are excellent at breaking down the bonds in adhesives.
4. Cooking Oils (Vegetable, Olive, Canola, Coconut)
You likely have one of these in your pantry!
- How-To: Apply a liberal amount of your chosen cooking oil directly onto the label and the adhesive residue. Don’t be shy!
- Penetration Time: Allow the oil to penetrate the adhesive for 10-30 minutes.
- Rub & Wash: Rub the area vigorously with a cloth or a scrub brush. The oil will help the adhesive roll off. Finish by thoroughly washing the jar with soap and water to remove all oil residue.
5. Peanut Butter
Yes, your favorite spread can be a label remover!
- How-To: Spread a thin, even layer of creamy peanut butter over the entire label. The oils in the peanut butter are the key here.
- Let it Work: Let it sit for 15-30 minutes, giving the oils time to break down the adhesive.
- Wipe & Clean: Rub off the peanut butter and label residue with a clean cloth. Then, wash the jar thoroughly with warm, soapy water to remove any remaining oil and peanut butter.
Solvent-Based Solutions: When You Need a Little Extra Power
For the toughest labels, sometimes a solvent is necessary. Always use these in a well-ventilated area.
6. Rubbing Alcohol (Isopropyl Alcohol)
A common household disinfectant, also great for sticky situations.
- How-To: Dampen a cotton ball or a clean cloth with rubbing alcohol.
- Rub Away: Rub the alcohol firmly over the label and particularly the adhesive area. Continue rubbing until the adhesive dissolves and can be scraped away.
7. Acetone (Nail Polish Remover)
A powerful solvent. Use with care.
- How-To: Apply a small amount of acetone to a cotton ball. Important: Always test on an inconspicuous area of the glass first to ensure it doesn’t affect any finish or etching.
- Gentle Rub: Gently rub the cotton ball over the adhesive, dissolving it.
- Clean Up: Wipe clean and wash the jar thoroughly with soap and water afterward to remove all traces of acetone.
8. White Vinegar
An acidic approach to adhesive removal.
- How-To: Soak the labeled portion of the jar in undiluted white vinegar for 15-30 minutes.
- Scrub & Rinse: Use a scrub brush or sponge to remove the loosened label and adhesive.
- Odor Removal: Wash the jar with soap and water to eliminate any lingering vinegar smell.
9. Commercial Label Removers / Adhesive Removers (e.g., Goo Gone)
Designed specifically for this purpose.
- How-To: Always read and strictly follow the specific instructions provided on the product packaging. These products are formulated to be highly effective.
- Application: Typically, you’ll apply the product, allow it to sit for a recommended time, and then wipe clean.
- Post-Use Wash: Ensure jars are washed thoroughly after using commercial products to remove any chemical residue.
Heat and Abrasive-Assisted Methods: Combining Forces
Sometimes a little friction or direct heat is all it takes.
10. Baking Soda and Oil Paste
A gentle abrasive and oil combination.

- How-To: Create a paste by mixing equal parts baking soda and cooking oil.
- Apply & Sit: Apply the paste generously over the label and adhesive, letting it sit for 15-30 minutes.
- Scrub & Clean: Scrub the area with a non-abrasive sponge or cloth to remove the label and residue. Finish by cleaning the jar with soap and water.
11. Hair Dryer (Targeted Heat Application)
Direct heat can soften even the toughest glues.

- How-To: Use a hair dryer on a high heat setting, directing the hot air onto the label for 30-60 seconds. The goal is to warm the adhesive, not make the glass too hot to handle.
- Peel While Warm: The heat will soften the adhesive, allowing you to peel off the label while it’s warm.
- Scrape Residue: Scrape away any remaining sticky residue.
Tips for Tackling Stubborn Residue
Even after trying a method, you might find some sticky bits left behind. Don’t give up!
- Re-apply: Don’t hesitate to re-apply your chosen method for a second round if needed. Sometimes, the adhesive just needs more time or more product.
- Scraping Tools: For truly stubborn spots, use a plastic scraper, an old credit card, or, with extreme caution, a razor blade (holding it at a very shallow angle to avoid scratching the glass).
- Friction Power: After soaking, try rubbing
As you can see, there’s a whole arsenal of methods at your disposal for removing stickers from glass jars. From simple hot water soaks to powerful solvents, finding the best technique often depends on the type of label and adhesive you’re dealing with. Don’t be afraid to experiment!
Why reuse glass jars and bottles?
Reusing glass jars and bottles is a fantastic habit with numerous benefits for both the environment and your household economy. While recycling glass is good, reusing it directly extends its life even further before it needs to be processed, saving even more energy and resources.
- Reduces Waste: Keeps items out of landfills and lessens demand for new production.
- Saves Energy & Resources: Avoids the energy-intensive process of manufacturing or even recycling new glass, conserving raw materials like sand.
- Is Cost-Effective: Saves money on buying new storage or decorative items.
- Offers Versatile Storage: Great for pantry, fridge, freezer, and organizing various household items.
- Is Safe for Food: Glass is inert, so it doesn’t leach chemicals into food and keeps contents fresh.
- Encourages Creativity: Perfect for DIY crafts, decor, and unique household solutions.
Reuse used glass jars after removing the labels. It’s a simple, eco-friendly, and economical choice!
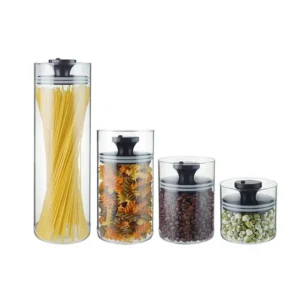
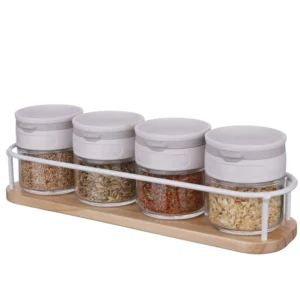
Recommended Reusable Glass Jars
Conclusion
Now you maybe know how to take off sticker residue from glass, please remember to always prioritize safety, especially when using hot water, chemical solvents, or sharp tools. With a little patience and the right method, your glass jars will be sparkling clean and ready for their next life! Happy repurposing!
Discover the ideal glass jar and bottle solutions tailored to your every need by visiting EasyLife’s website today. We offer an extensive and diverse array of high-quality glass jars and bottles, meticulously curated to meet a multitude of requirements.
Whether you’re a burgeoning business seeking reliable, sustainable, and aesthetically pleasing packaging for your products, or an individual looking for practical, elegant, and eco-friendly storage and crafting options for your home, EasyLife has you covered. Our commitment to quality and customer satisfaction means you’ll find exactly what you’re looking for, backed by services designed to ensure a seamless experience. Explore our collection and let our products elevate your business or personal projects.


