We’ve all been there: you’re finishing off a perfectly seared steak or a fresh Caesar salad, and you reach for your trusty pepper mill to provide that final, pungent punch of flavor. But instead of a fragrant shower of spice, you get a gritty, inconsistent grind—or worse, a dull, dusty taste that lacks that signature “bite.” If your pepper mill feels like it’s “working harder” lately, it’s likely not the peppercorns. Have you ever thought about how to clean a pepper mill?

Cleaning your pepper mill isn’t just about hygiene, it’s about restoring the mechanical precision of your kitchen’s most underrated workhorse. Whether you have a classic wooden heirloom, a sleek stainless steel model, or a high-tech ceramic grinder, regular maintenance is the secret to restaurant-quality seasoning.
In this guide, we’ve synthesized expert advice from top culinary pros to bring you the ultimate maintenance routine. From the “30-second rice trick” to a full mechanical deep-clean, here is everything you need to know to keep your grinds fresh, your mechanism smooth, and your flavors sharp. So, how to clean a pepper mill? In this article, let’s explore it in depth.
Why Need to Clean a Pepper Grinder?
Most home cooks view their pepper mill as a “set it and forget it” kitchen gadget. However, peppercorns are packed with volatile organic compounds and oils. According to culinary chemistry, fresh pepper can lose up to 50% of its aromatic potency within just 30 minutes of being ground. When those oils sit inside your mill’s mechanism for months, they turn rancid, creating a sticky residue that traps old dust and dulls the flavor of every new batch you add.
Furthermore, a study by the University of Virginia highlighted a darker side to our spice cabinets: because we often grab our mills mid-prep while handling raw proteins, pepper grinders are frequently the most cross-contaminated items in the kitchen—often harboring more bacteria than our cutting boards.
In addition to hygiene issues, if we use a very unsatisfactory grinder after making a delicious steak, such as large peppercorns rolling on the steak, or spinning hard without peppercorns responding to your call. This will ruin your good mood to ready for the meal and will affect the flavor of the food.
How to Clean a Pepper Mill?
1. The Secret Power of Rice (Quick Clean)
If your mill isn’t physically broken, but the flavor feels “off” or the grind feels sluggish, you don’t need a screwdriver—you just need your pantry. This is the gold standard for routine maintenance, recommended by experts at Epicurious and Wirecutter alike.
Why It Works
Standard white rice is dry, abrasive, and highly absorbent. As it passes through the burrs, it acts like a mechanical sponge. It scours away “pepper mud” (the sticky paste created when dust meets moisture) and absorbs the rancid oils that have clung to the grinding mechanism.
The Step-by-Step Process
- Empty the Mill: Pour out your existing peppercorns. (Tip: Save them in a small jar so they don’t roll away!)
- Add the Rice: Fill the reservoir with about 1 to 2 tablespoons of uncooked, plain white rice. (Crucial Note: Avoid “Instant” or “Minute” rice, which is too soft, and brown rice, which contains its own oils. Standard long-grain white rice is the most effective.)
- Grind Away: Set your mill to a medium-coarse setting and begin grinding. You will see a grey or off-white “flour” coming out—this is the rice pulling out the old pepper residue.
- Finish the Clean: Continue grinding until the powder coming out is pure, snowy white.
- The “Purge” Grind: Empty any leftover rice bits and refill the mill with a small amount of peppercorns. Grind about a teaspoon of pepper through the mill to ensure any remaining rice dust is cleared out before you season your next meal.
How Often Should You Do This?
For the average home cook, a “Quick Refresh” should be performed every 3 to 6 months, or every time you switch pepper varieties (e.g., moving from Black Tellicherry to White Peppercorns).
By spending $0.05 on a tablespoon of rice and 60 seconds of your time, you can effectively reset your mill’s performance to “factory fresh” levels without ever getting your hands wet.
2. Full Disassembly (Deep Clean)
While the rice trick handles the interior mechanics, a yearly “Deep Clean” is essential for removing the stubborn grease, fine dust, and bacterial buildup that accumulate in the joints and the exterior body.
When to Deep Clean
- If the mill is physically jammed.
- If you notice a sticky “film” on the exterior.
- If you are preparing the mill for long-term storage.
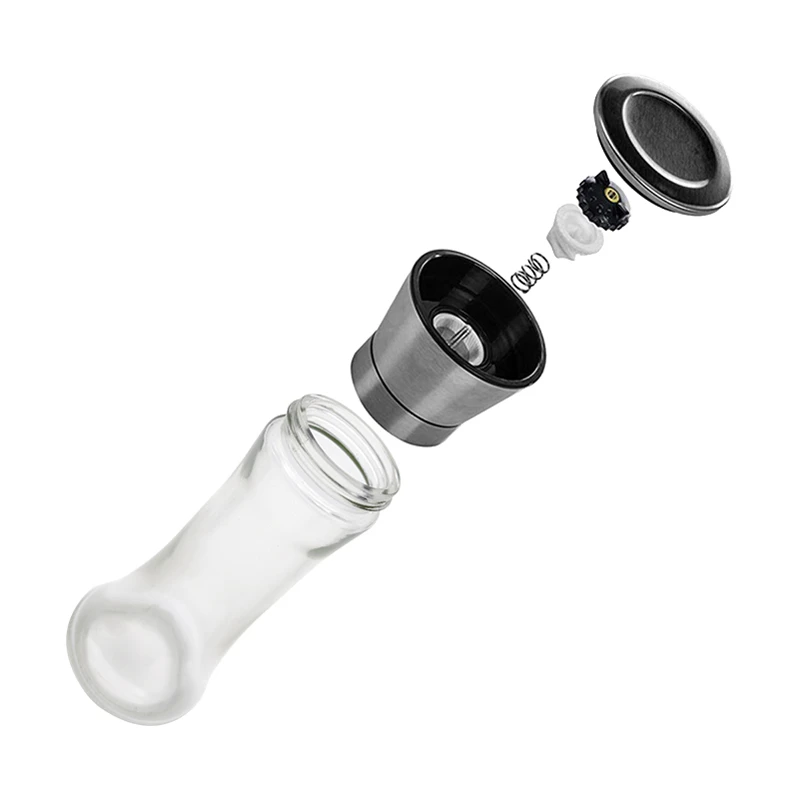
How to fully disassemble?
Step 1: The Teardown
Most high-quality mills (like those from Fletcher’s Mill or Robert Welch) follow a similar construction.
- Unscrew the top nut (the metal knob on top).
- Remove the head/top of the mill.
- Slide out the central shaft and the spring (if applicable).
- Remove the grinding burrs from the bottom.
Pro Tip: Lay the parts out on a clean towel in the exact order you removed them. This ensures you don’t put the tension spring in backward!
Step 2: Dry Brushing
Before introducing any moisture, use a stiff-bristled brush (a clean toothbrush or a pastry brush works perfectly). Brush the “teeth” of the grinding mechanism. You’ll be surprised at how much compressed pepper “scales” will flake off.
Step 3: Cleaning by Material
This is where many people ruin their mills. Follow these material-specific rules:
- For Wood: Never use soap and water. Wipe the wood with a soft, slightly damp cloth, then immediately buff it dry.
- For Ceramic Burrs: These are the only parts that truly benefit from a wash. You can soak ceramic burrs in warm, soapy water to dissolve oils. They must air-dry for at least 24 hours.
- For Metal Parts: Use a dry microfiber cloth. If there is rust, a tiny drop of food-grade mineral oil on a cloth can help buff it away.
Step 4: The “Bone Dry” Rule
Moisture is the mortal enemy of a pepper mill. If you reassemble the mill while the ceramic or wood is even slightly damp, your peppercorns will absorb that water, swell up, and create a “pepper clog” that can actually snap the internal plastic or wooden supports.
Data Point: Wood can retain internal moisture for hours even if it feels dry to the touch. In a humid kitchen, it takes approximately 24 to 48 hours for a washed ceramic grinding stone to be 100% moisture-free.
Step 5: Reassembly and Lubrication
Once dry, slide the components back together. If you have a wooden mill, this is the perfect time to apply a thin layer of food-grade mineral oil or “Butcher Block Cream” to the exterior. This prevents the wood from drying out and cracking over time, especially if stored near a hot stove.
Pro-Tips: Prevention and Performance
Now that your mill is sparkling clean, the goal is to keep it that way for as long as possible. Avoiding the “Three M’s”—Moisture, Metal-on-Metal, and Mud—will ensure your mill remains a lifetime tool rather than a disposable gadget.
The “No-Steam” Rule
The single biggest mistake home cooks make is grinding pepper directly over a steaming pot of pasta or soup.
- The Problem: Steam rises at 100°C (212°F) and enters the mill from the bottom. The fine pepper dust inside instantly turns into “pepper mud,” which dries into a cement-like clog.
- The Pro Move: Grind your pepper into a small prep bowl or even your palm first, then sprinkle it into the pot. This keeps the grinding mechanism bone-dry.
Mind the “Dry Grind”
Never twist your pepper mill when it is empty.
- The Data: In ceramic or steel mechanisms, grinding “dry” (without peppercorns acting as a buffer) causes the burrs to rub directly against each other. This can cause micro-fractures in ceramic or dull the teeth of steel gears, reducing the efficiency of your grind by up to 30% over time.
- The Fix: As soon as you feel the tension change and the grind becomes “easier,” stop and refill.
Optimal Storage: Location Matters
While it looks great on the back of the stove, the stovetop is the worst place for a pepper mill.
- The Data: Kitchen stoves are zones of high “micro-humidity.” Storing a mill within 12 inches of a stovetop exposes it to fluctuating temperatures and grease particulates that can turn the exterior sticky and the interior clumped.
- The Fix: Keep your mill in a cool, dry pantry or on a decorative tray on the dining table.
Choose the Right Peppercorn Size
Not all peppercorns are created equal. Most manual mills are designed for standard 5mm peppercorns.
- The Warning: Oversized varieties like Long Pepper or very small, soft berries like Pink Peppercorns can jam or gum up a standard steel mechanism.
- The Fix: Check your manufacturer’s guide (like Fletchers’ Mill or Peppermate) before experimenting with exotic berries.
Quick-Clean Summary Table
| Cleaning Task | Frequency | Method | Pro Benefit |
| The “Rice Refresh” | Every 3–6 Months | Grind 2 tbsp white rice | Removes rancid oils & clogs. |
| Exterior Wipe | After every use | Microfiber + damp cloth | Stops cross-contamination. |
| The Deep Clean | Once a year | Full disassembly & brush | Prevents mechanical failure. |
| Wood Conditioning | As needed | Food-grade mineral oil | Prevents cracking & aging. |
EasyLife Housewares: The Ideal Choice for Your Kitchen and Business
When you are a wholesaler, you see firsthand which products stand the test of time and which ones end up in the bin after a single clog. At EasyLife Housewares, we’ve spent years perfecting the balance between elegant design and industrial-grade durability. We don’t just sell pepper grinders; we provide precision tools designed to last a lifetime.
Why Professionals Choose EasyLife:
- Maintenance-First Engineering: While many retail grinders are difficult to disassemble, our mills are designed with the user in mind. Our “Easy-Access” mechanisms make the cleaning methods described in this guide faster and more effective.
- Premium Grinding Core: We utilize high-carbon steel and diamond-sharp ceramic burrs that resist the “oil-clumping” effect. This means you need to perform the “Rice Refresh” less often compared to standard market models.
- Wholesale Reliability: We understand the demands of a high-volume kitchen. Our mills are built to withstand the “Three M’s” (Moisture, Metal-on-Metal friction, and Mud) better than any consumer-grade alternative.
- Aesthetic Meets Utility: From classic glass material, modern stainless steel that wipes clean in seconds, our collection fits any culinary brand.
Are you a retailer or restaurant owner looking to upgrade your spice game? Don’t settle for “disposable” kitchenware. Choose the grinders that are as easy to maintain as they are beautiful to use. Contact Us for Bulk Pricing and Custom Orders!
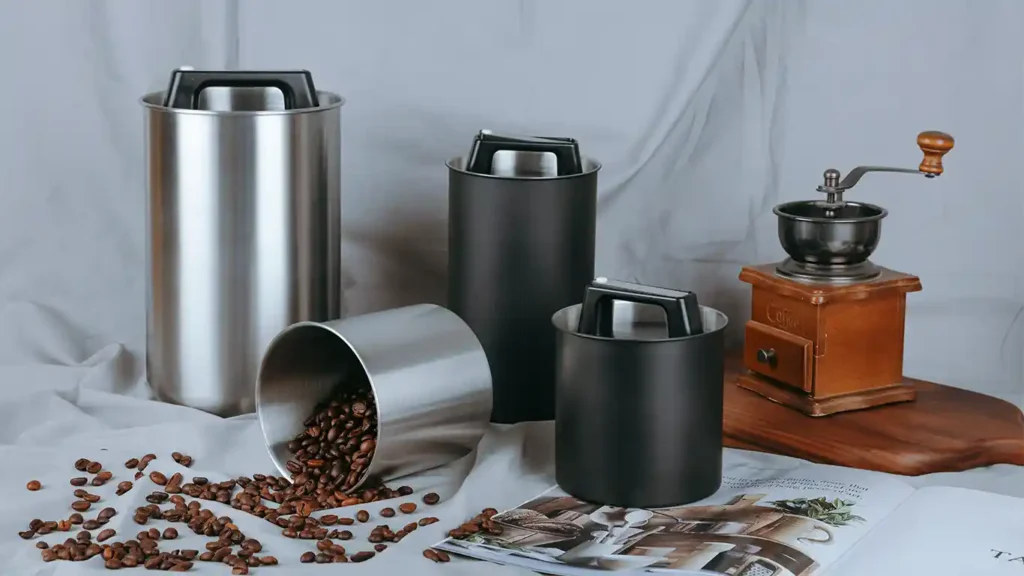
Recommended Pepper Grinders


FAQ about Pepper Grinders
Can I use vinegar to clean my grinder?
While you can use a small amount of distilled white vinegar to wipe down the exterior of a stainless steel, acrylic, or plastic grinder to remove grease and fingerprints, you should never use it to clean the internal grinding mechanism or wooden bodies. The acidity in vinegar can corrode metal components and strip the protective finish or seasoning off ceramic burrs, while the moisture it introduces can cause wooden mills to swell, warp, or crack. Most importantly, vinegar’s strong scent can linger in the porous parts of the mill, permanently tainting the flavor of your peppercorns; for internal cleaning, stick to the white rice method or a dry brush to ensure your spice profile remains pure.
Can a dirty grinder affect taste?
Absolutely; a dirty grinder is the most common culprit behind “dull” or bitter seasoning. Peppercorns contain volatile oils that, over time, coat the internal burrs and turn rancid when exposed to air and moisture. If these old, oxidized oils aren’t cleaned out, they mix with your fresh peppercorns, masking their vibrant, floral notes with a stale, metallic, or “dusty” aftertaste. Furthermore, a buildup of old pepper “mud” can cause an uneven grind, meaning you lose that sharp, pungent “bite” that only comes from a clean, precise break of the spice’s hull.
What are the signs your grinder needs cleaning?
The most obvious signs that your grinder is overdue for a cleaning are a noticeable loss of flavor and mechanical resistance. If your pepper tastes “dusty” or lacks its signature pungent aroma, it’s likely that rancid oils have coated the burrs. Physically, you may notice that the top nut or adjustment knob has become difficult to turn, or that the mill is “spinning” without producing much ground pepper—a clear indicator of a “steam clog” or oil buildup. Additionally, if the grind size becomes inconsistent or if you see visible, sticky residue around the base of the mechanism, it’s time to stop grinding and perform a quick refresh to prevent permanent damage to the gears.
How to take apart a pepper grinder?
To take apart a pepper grinder, start by unscrewing the decorative metal nut at the very top and removing the head or crank handle. Gently slide the central metal shaft (the rod) down through the bottom of the mill, being careful to catch any small tension springs, washers, or adjustment rings that may be threaded onto the rod. Once the shaft is clear, the internal grinding burrs—usually a cone-shaped piece and a matching ring—should be accessible or can be popped out with a light tap. To ensure a smooth reassembly, lay each part out on a clean towel in the exact order you removed them, as this prevents the common mistake of installing the tension spring or burrs upside down.
The Final Verdict: A Lifetime of Flavor
A high-quality pepper mill is an investment in your cooking. By spending five minutes on a “Rice Refresh” every few months and keeping it away from the steam of your stove, you protect that investment and ensure that every meal you serve has the sharp, vibrant aroma that only freshly ground pepper can provide.
Don’t wait for your mill to seize up or your pepper to taste dusty. Grab a tablespoon of white rice today and give your grinder the “spa day” it deserves. Your taste buds—and your steak—will thank you.