There is nothing quite like the anticipation of opening a jar of homemade pickles or summer strawberry jam, only to find that the lid won’t budge. You pull, you twist, and you strain—but that lid is locked tight.
While it feels like a personal vendetta by the jar, a stubborn lid is actually a badge of honor for the canner! It means the preservation process worked perfectly. In this guide, we’ll look at why these mason jars seal so tightly and the best expert-approved hacks on how to open a sealed mason jar without breaking a sweat.
The Science of the Seal: Why is it so Stuck?
Before we reach for the tools, it helps to understand what we’re fighting against. A sealed mason jar isn’t just “screwed on tight”; it is held shut by the weight of the atmosphere.
How the Seal is Created (The Principle)
When food is canned, the jar is heated, causing the air and food inside to expand. This expansion forces air out of the jar. As the jar cools, the remaining steam turns back into water, and the air inside contracts. This creates a vacuum (negative pressure).
Why We Need to Seal the Mason Jars?
The Force: Because the pressure inside the jar is lower than the air pressure outside, the atmosphere literally “presses” the lid onto the glass. You aren’t just fighting a lid; you’re fighting air pressure!
Safety: The airtight seal prevents bacteria and mold from entering.
Freshness: It stops oxygen from reaching the food, which preserves the flavor and nutrients.
12 Expert Hacks about How to Open a Sealed Mason Jar
1. The Spoon Lever (The Classic)
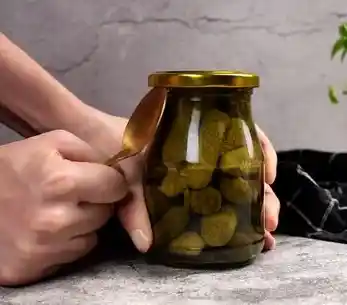
Slide the edge of a sturdy tablespoon under the rim of the flat lid. Using the glass rim as a fulcrum, pry gently upward. You are looking for a tiny gap to let air in; once you hear the “psst” of the vacuum breaking, the lid will lift right off.
2. The “Ring” Hack (No Tools Required)
This uses the jar’s own equipment. Take the metal screw band you just removed, turn it sideways, and hook the edge under the flat lid. Use your palm to press down on the opposite side of the ring to pop the seal.
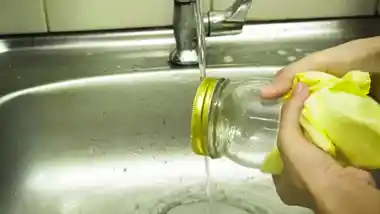
3. Thermal Expansion (The Hot Water Bath)
Metal expands faster than glass when heated. Run hot tap water over the lid for 30–60 seconds, or soak the jar upside down in a shallow bowl of warm water. This expands the lid and melts any “sugar glue” from jams or syrups.
4. The “Water Hammer” (The Palm Smack)
Hold the jar at a 45-degree angle in one hand. With the heel of your other hand, give the bottom of the jar a firm, flat smack. The force of the liquid inside hitting the lid can often break the vacuum seal instantly.
5. Friction Boosters (Rubber & Silicone)
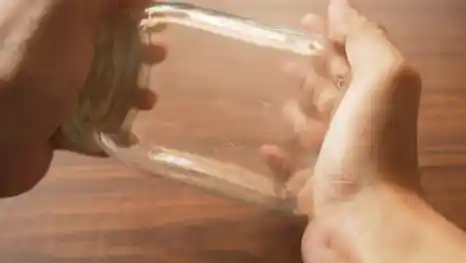
Sometimes the issue is just grip. Use a pair of rubber dishwashing gloves, wrap a thick rubber band around the lid, or use a square of silicone shelf liner. This maximizes the torque your hand can apply to the lid.
6. The “Church Key” Bottle Opener
Standard bottle openers (the kind with the triangular hooked end) are perfectly shaped for this. Hook the opener under the lid’s edge and lift slightly. Be careful not to use too much force, as you don’t want to chip the glass threads.
7. The Wooden Spoon Tap
Take a wooden kitchen spoon and firmly tap around the circumference of the metal lid. This vibration can help disrupt the vacuum seal or break up any dried food particles that are acting like cement between the lid and the glass.
8. The Last Resort (Puncture the Lid)
If you don’t need to reuse the lid (and for canning, you shouldn’t reuse the flat lids anyway), use a hammer and a small nail or a sharp ice pick to poke a tiny hole in the center of the lid. This equalizes the pressure instantly, and the lid will fall off.
9. The Duct Tape “Handle”
If you don’t have a jar opener, you can create one with duct tape. Tear off a strip about 12 inches long. Wrap half of it around the side of the lid, then fold the remaining half onto itself to create a “tail” or handle. Grabbing the handle and pulling gives you massive leverage to twist or pull the lid.
10. The “Countertop Tap”
This is a variation of the wooden spoon method. Hold the jar at an angle and very gently tap the edge of the lid against a wooden cutting board or a protected countertop. Rotating the jar as you tap helps “unseat” the rubber gasket from the glass rim.
11. Using a Jar Wrench
If you find yourself canning often, it’s worth investing in a Jar Wrench. This is a plastic or metal tool designed specifically to fit the diameter of Mason jars. It provides a 360-degree grip, distributing pressure evenly so you don’t accidentally break the glass while trying to get the lid off.
12. Preventative Maintenance (For Next Time)
The best way to open a jar easily is to prepare it before it ever goes into the pantry:
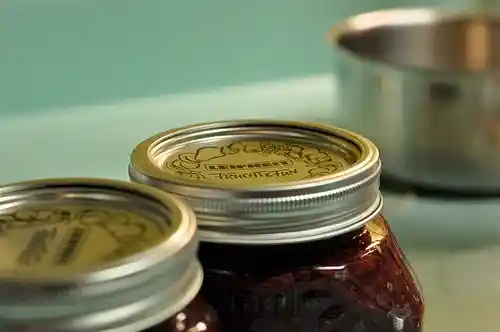
Wipe the Rims: Before sealing, always wipe the rim of the jar with a clean, damp cloth. Any residue (especially sugar) will act like superglue once it cools.
Don’t Over-Tighten: When canning, only tighten the rings “fingertip tight.” If you crank them on with all your strength, they may become nearly impossible to remove after the vacuum forms.
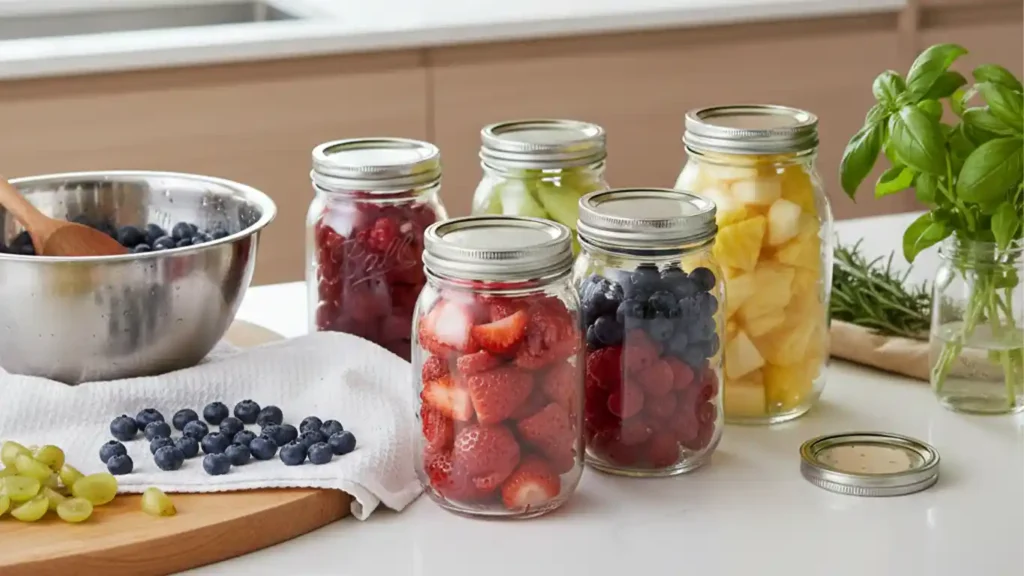
High-quality Mason Jars
")


")

Important Precautions for Opening Mason Jars
Opening a sealed jar might seem like a simple task, but when physics and glass are involved, safety should come first. Keep these precautions in mind:
1. Avoid Extreme Temperature Shocks
While hot water is a great way to expand a metal lid, never submerge a cold jar directly into boiling water. Glass is sensitive to “thermal shock.” A sudden, extreme change in temperature can cause the glass to shatter instantly in your hands. Stick to warm or hot tap water.
2. Guard Against Glass Chips
When using metal tools like spoons, knives, or bottle openers to pry a lid, be gentle.
- The Risk: Applying too much pressure against the glass rim can cause tiny, invisible shards of glass to flake off.
- The Check: Once the jar is open, carefully wipe the rim with a clean cloth and inspect the food near the top for any debris before serving.
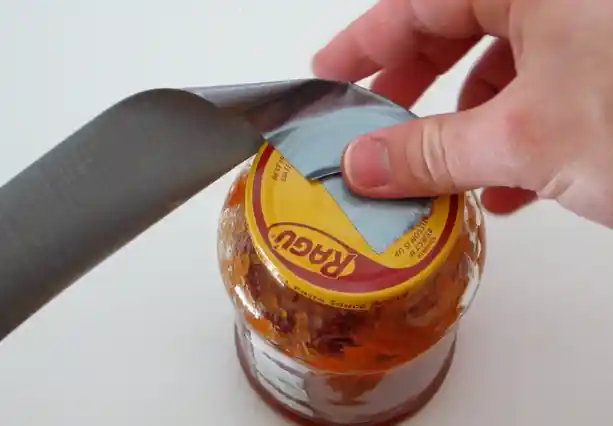
3. Never Use Sharp Knives for Prying
It is tempting to slide a steak knife under the lid, but this is a leading cause of kitchen injuries. Knives can easily slip off the slick glass or snap under pressure. Always use a blunt tool like a sturdy spoon or a dedicated jar opener.
4. Don’t Force a “Stuck” Ring
If the screw-on metal band is stuck, don’t use pliers or heavy wrenches that could crush the glass neck of the jar. If the ring won’t move, use the Heat Expansion method (hot water) to loosen the ring specifically before trying to pop the flat lid.
5. Check for Spoilage After Opening
The vacuum seal is your safety guarantee. Once you break that seal:
- Listen for the “Pop”: If you don’t hear a rush of air or a “pop,” the seal may have already been broken, meaning the food might be unsafe.
- The Smell Test: If the contents have an “off” odor, or if liquid squirts out forcefully when the seal breaks (indicating pressure from gas-producing bacteria), do not taste the food. When in doubt, throw it out.
6. Protect Your Hands
If you are using the “Water Hammer” (palm smack) or “Countertop Tap” methods, consider wrapping the jar in a dish towel. This provides a better grip and protects your hand just in case the glass has an invisible flaw and happens to crack.
Conclusion
Opening a stubborn mason jar can be a test of patience, but remember: that struggle is the ultimate proof that your food has been preserved safely. Whether you choose the surgical precision of the spoon lever, the simple physics of thermal expansion, or the brute force of a rubber grip, there is no lid that can stay sealed forever.
The next time you’re faced with a jar that won’t budge, don’t reach for a sharp knife or give up in frustration. Start with the gentlest method first—like a quick run under hot water—and work your way up to the heavy hitters. With these 12 expert hacks and safety precautions in your kitchen toolkit, you’ll spend less time wrestling with glass and more time enjoying the delicious, home-canned flavors inside.