As a staff member who often eats hot meals in the office, I think we’ve all experienced this scene. You’ve waited all morning for your leftovers. You heat them up in the office microwave, the delicious aroma fills the room, and your stomach growls in anticipation. But when you grab the container, the lid is stuck.
You pull. You pry. You consider using a screwdriver from the maintenance closet. It’s as if the container has decided that the food inside belongs to it now. This phenomenon, often called “the vacuum seal of doom,” is a common kitchen frustration. But why does it happen, and how to open airtight container after microwave? Let’s dive into the science and the simple solutions to end the struggle.
Why Does the Lid Get Stuck?
It feels like someone sneaked into the breakroom and super-glued your container shut, but what you’re actually experiencing is a masterclass in thermodynamics. The “stuck lid” syndrome is caused by a rapid shift in air pressure, and it usually happens in three distinct stages:
Stage 1: The Great Expansion
When you place your container in the microwave, the water molecules in your food begin to vibrate and heat up. This creates steam. At the same time, the air trapped between your food and the lid heats up. According to the laws of physics, hot air molecules move faster and take up more space. If your lid isn’t perfectly airtight, some of this high-pressure air and steam escapes out from under the edges of the lid.
Stage 2: The Cooling Trap
The moment the microwave timer beeps and you remove your container, the heating stops. As the air inside the container begins to cool—even by just a few degrees—it undergoes thermal contraction. Those fast-moving air molecules slow down and huddle together, taking up much less space than they did seconds ago.
Stage 3: The Vacuum Effect
Because some of the air escaped during the heating phase, there is now “less” air inside the container than there was at the start. As that air shrinks, it creates a partial vacuum.
At this point, you aren’t just trying to lift a plastic lid; you are fighting against the atmospheric pressure of the room. The air outside the container is now much heavier than the air inside, and it is pushing down on the lid with surprising force—sometimes as much as 14.7 pounds per square inch. Essentially, the atmosphere is “pinning” your lunch box shut, and without a way to let air back in, your lid isn’t going anywhere.
5 Ways to Open a Stuck Lunch Box (Step-by-Step)
If you’re currently staring at a stuck lid, don’t use brute force—that usually results in a face full of hot soup. Instead, use these five physics-based methods to break the seal:
1. The “Quick Expansion” Re-Heat
This is the most reliable method because it reverses the exact process that created the vacuum in the first place. By adding heat, you force the internal air to expand again, pushing the lid outward.
- Step 1: Place the container back into the microwave. Do not try to force it open yet.
- Step 2: Heat on high for 15 to 20 seconds. This is usually enough to agitate the air molecules and increase the internal PSI (pounds per square inch).
- Step 3: Use oven mitts to remove the container. While the air is still hot and expanded, try to lift the lid immediately.
- Step 4: If it remains stubborn, repeat in 10-second increments. The goal is to make the internal pressure equal to or greater than the outside pressure.
2. The Hot Water Soak
Heat causes materials to expand, and water is an excellent conductor of heat. This method is particularly effective for glass containers with plastic lids, as the two materials expand at different rates.
- Step 1: Run hot tap water (the hottest it can go) directly over the rim of the lid for about 60 seconds. Focus on the area where the seal meets the base.
- Step 2: If the lid is still stuck, fill a shallow bowl with hot water. Submerge the container upside down so only the lid is underwater for 1 to 2 minutes.
- Step 3: The heat will cause the lid to soften and expand slightly, and the air trapped just beneath the surface will warm up.
- Step 4: Pat the container dry to ensure you have a firm, non-slip grip, and pull the lid upward steadily.
3. The “Hiss” Method (Manual Air Gap)
The vacuum only exists because the seal is perfect. Breaking that airtight bond for even a millisecond allows the pressure to equalize instantly.
- Step 1: Find a blunt, flat tool. A butter knife, a sturdy spoon handle, or even a credit card can work. Avoid sharp steak knives as they can slice through your silicone gaskets.
- Step 2: Locate a corner or the pull-tab of the lid. Gently slide your tool between the container rim and the silicone seal.
- Step 3: Apply a very slight prying motion. You are looking for that tell-tale “hiss” sound. That is the sound of atmospheric air rushing in to fill the vacuum.
- Step 4: Once you hear the hiss, the pressure is equalized. The lid, which felt like it weighed 100 pounds a moment ago, will now lift off with one finger. But remember to stay safe and don’t scratch yourself.
4. The Thermal Shock (Hairdryer)
This is a “dry heat” alternative, perfect for office environments where you might have a travel hairdryer or at home when you don’t want to get water inside your food.
- Step 1: Set your hairdryer to the highest heat setting.
- Step 2: Aim the nozzle at the seam where the lid meets the container. Move it in a continuous circular motion to ensure the heat is distributed evenly.
- Step 3: Continue for 60 to 90 seconds. The localized heat will cause the plastic of the lid to become more pliable and the air inside to vibrate and expand.
- Step 4: Using a dish towel (as the plastic will be hot), grip the lid and peel it back starting from one corner.
5. The Tap and Twist
Sometimes, the vacuum is reinforced by “stiction”—a combination of the vacuum seal and food residue (like sugar or fats) that has cooled and acted like glue on the rim.
- Step 1: Place the container on a flat, non-slip surface like a wooden cutting board or a silicone mat.
- Step 2: Using the heel of your hand, give a firm, sharp tap to the center of the lid. This sudden vibration can often “break” the surface tension of the food residue.
- Step 3: While maintaining downward pressure with one hand, use the other to try and “twist” the lid (if it’s round) or peel it upward from the strongest corner.
- Step 4: If you see an air bubble move along the seal, that is your opening! Focus your prying efforts on that specific spot.
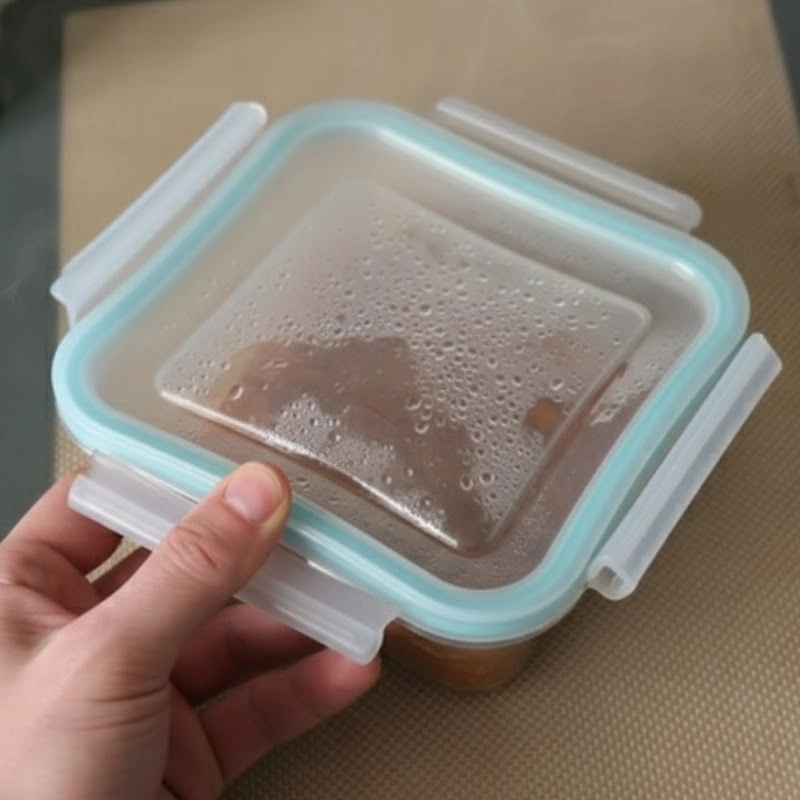
The Permanent Solution: Using an Air-Valve Lunch Box
While the hacks above are life-savers in a pinch, you shouldn’t have to perform a science experiment every time you want to eat. If you find yourself fighting with your lunch every day, it’s time to upgrade your gear.
We designed our all kinds of Air-Valve Lunch Boxes specifically to eliminate the “Stuck Lid Syndrome.”
Air-Valve Lunch Boxes

")
")


Why the Air Valve is a Game Changer:

Instant Pressure Equalization: Forget the knives and the hairdryers. Our lids feature a small, food-grade silicone valve. Simply click it open, and the vacuum is broken instantly. The lid lifts off effortlessly, every single time.
Microwave Safety: Many people don’t realize that microwaving a fully sealed container is a safety hazard. It can cause the container to warp or even explode. Our valve allows steam to vent safely while you heat, keeping your microwave clean and your container in perfect shape.
Superior Food Texture: Ever notice how food gets soggy in a standard sealed box? That’s trapped steam turning back into water. Our valve lets the excess moisture escape while keeping the heat in, ensuring your leftovers taste as good as the day they were made.
Leak-Proof & Airtight: When the valve is closed, the container is 100% airtight and leak-proof. It only “breathes” when you want it to.
Conclusion
A stuck lunch box lid is more than a minor annoyance—it’s a battle against physics. While knowing how to use heat and leverage can help you win the occasional fight, the best strategy is to avoid the vacuum altogether.
Stop the daily tug-of-war and make your lunchtime the relaxing break it’s supposed to be.
Choosing a fresh-keeping container equipped with an air valve is the simplest and most direct way to prevent and solve the problem of the lid getting stuck. Contact us to upgrade your kitchen!